Sunday, September 27, 2020
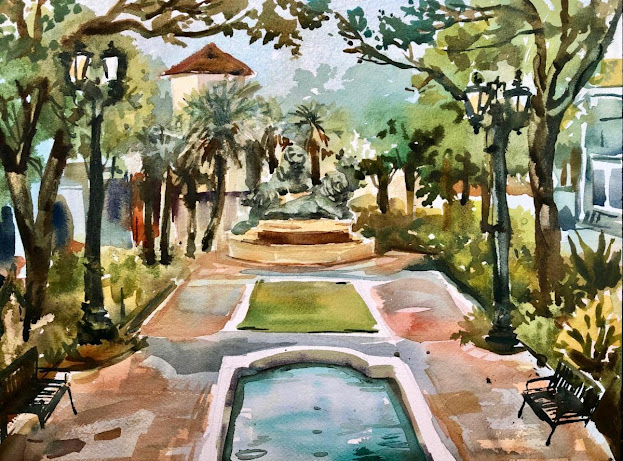
Fall Florida weather Watercolor Plein Air Class
When The Art Is Installed
It is always a pleasure when a work of art you have done is appreciated
enough by a client to be purchased, then to see it successfully hung on
their walls. This is a hand retouched print that I made from an existing
image I painting. The dimensions are slightly different, so I had the
printer divide the image into three parts as separate prints so that the
image would be larger than the original.
Here is a view of the original the giclee print was based on:
Saturday, September 26, 2020
Revisiting Older Paintings
Sunday, August 9, 2020
What I felt When This All Started in March and April
I wanted to reach out to everyone in the middle of this unusual time in which we are thrust.
This event, is a piece of history, and how we cope
will test our discipline and character.
Saturday, August 8, 2020
Water Technique: Bypassing the pencil sketch! Oh No!
By skipping the pencil sketch and going directly at the piece
with a flat wide sable, you can lightly "ghost" in a drawing in
paint, then add depth on top of that. It is scary at first but a great
skill to lend your watercolors a fresher more spontaneous feel.
Ok it will take practice, but do it, see what you think!
Friday, August 7, 2020
Tropical Colorfield
I have spent a lot of time doing realistic but occasionally
I want to explore abstract concepts. Here a brief view of
the latest abstract and some steps leading up to it.
Indian River
on the Indian River near Titusville Florida. It is two fast
layers of rich sumptuous oil paint done rapidly wet into wet.
Thursday, July 30, 2020
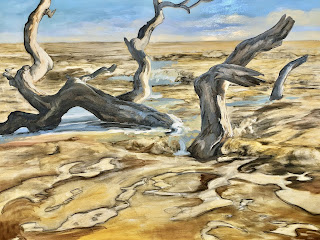
Rhythms of the Tides , A Continuance
Here is a video tour of the final product, and after that
I will share the step by step process in stills and video.
Here I illustrate the process of the latest Rhythms of the Tides oil 36"x48"
3. Add Sky
4. Videos below show adding color to driftwood as illustrated above.
Getting Started with the Wet Into Wet Oil technique
Glazing with the wet into wet
Thursday, July 16, 2020
How This Bird From Paradise?
I wanted to capture some of the beauty around my own home, in the garden I have worked so hard to create. Due to the lock down environment we are in, I am fortunate to have created a little green landscape bubble to live in, and rarely have before had the time to really enjoy and meditate on the beauty I have put before me.
I did this large 36"x48" acrylic painting on a textured base of Utrecht gesso. I did a crosshatch and swirl base technique with a large stiff brush on it so that it would present unforeseen sculptural anomalies to the application of color. Texture lends a sense of the unknown, the surprising, and the abstract to the final piece. It presents new opportunities to explore and inhabit in the color fields suggested in this magnificent creature.
Of course there is the initial sketch with charcoal. I immediately started attacking each petal individually, but soon found that I had ignore my classical training and had skipped the preliminary ground wash on the base. I wished I had because I was working to hard to get coverage of the white gesso. "Kill the white" ! is the mantra, once you give the canvas a tone it sets the pace for the rest of the painting and makes the coats go down easier and more richly.
Here I was nearly finished, but for clarity I eliminated a few things and enhanced others. You may be able to spot the slight changes in the final phase. Play it like a kids game, spot the differences!
" Shadows and Dust " Why Fear, Where Courage?
Below is the overview and below that a few closeups
to show the thin threads of brighter color added.
As you can see I was adding brighter color in the thinnest threads to push the edges like an abstraction, where the cool and warm light could meet and interact in the eye at the periphery.
I am adding here some early videos I made while in the process of starting. I didn't have energy or time to show the later process, because I did not know myself where the process would lead!
Thursday, July 2, 2020
"Heading Out To Sea"
to do that classical style oil I always wanted to do. I wanted
to deliberately use all or at least some of the more time consuming
techniques that involve use of more oil glazing and rich oil mixes.
It makes everything take much longer to dry, but the look is more
sumptuous. It is a large piece at 36" x 48". I tend to work best at
night, though I often wish it weren't so. I have to get chores off my
mind before I can dive into the concentration painting requires. I
did this piece over a three week period, but if I had worked more
consistently I could have gotten it down to about a week, not including
drying time. The last coat was the most interesting. After I got the
sketching and base colors worked out, and I knew where everything
went, I was finally able to loosen up the top coat. I like it to
look at once dashed out and carefully planned.
into the oil paint laying down thin layers. Shadow and linear
details can then be used with a little less turpentine and map
out the darker areas, while wiping away the highlight areas
with a finger in a rag, or brush damp with turpentine. Then
minimal amounts of color quickly start to illustrate and bring
out the potential of the painting.
Todays Wednesday Custom Art Lessons
Here are some students engaged each on their own paintings, I help each one at their unique level. Each of my students are amazing creative...

-
Here are some students engaged each on their own paintings, I help each one at their unique level. Each of my students are amazing creative...
-
I offer painting lessons to small groups in my private studio located near San Marco. Here, you will learn the basics of abstract and rep...


